


Springboot服务端渲染中vite,webpack的妙用
Springboot服务端渲染中vite,webpack的妙用1. 服务端渲染
虽然说现在用Java搞服务端渲染很离谱,如果你为了某些用户体验、SEO、历史原因不得不使用模板引擎,我推荐你坚持使用thymeleaf。
如果你的页面写的够标准,在定义页面结构和样式的时候可以不用每次编译Java直接运行,直接使用热重载开发,更快捷。

我是忠实的Idea玩家,开发的时候不想切换到其他工具,就想把后端和页面一起写;加上现在很多npm工具包,在构建前端静态资源的时候需要使用一些打包工具,下面我会推荐几个实践。
2. RequireJS
如果只是简单页面的开发,我推荐使用RequireJS来完成模块引入就行了,不需要使用打包工具,可以看这篇文章:
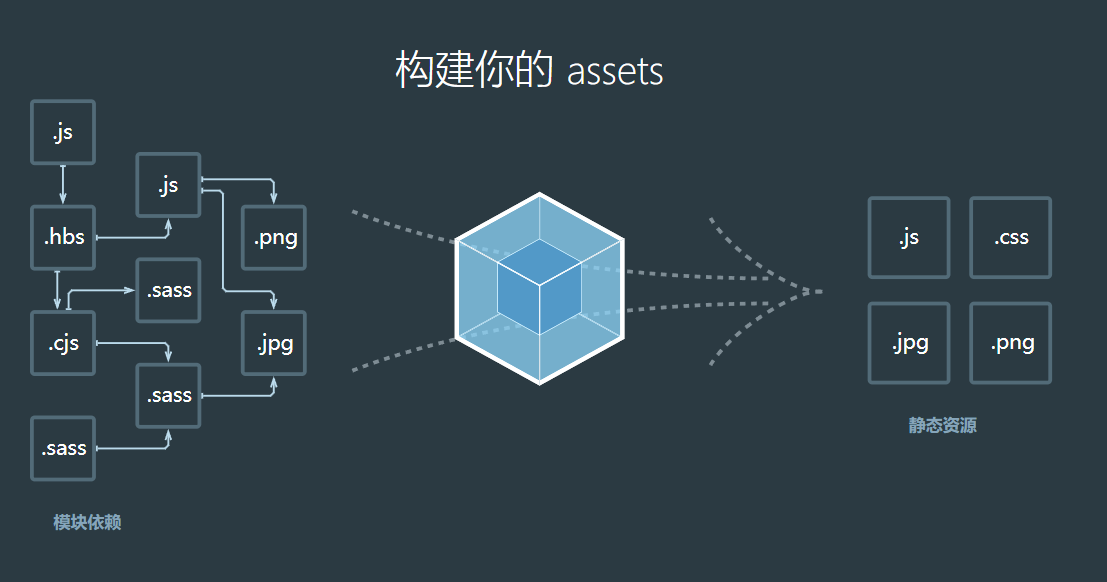
3. 结合webpack
如果我们的页面比较多,结构比较复杂,并且需要前端资源的版本管理,可以使用webpack。
首先我的资源都放在springboot的resources目录下面,然后贴一下dev和prod的两个环境的webpack配置,很简单。
dev
const path = require('path');
module.exports = {
    entry: {
        index: './src/index/index.js'
        about: './src/about/about.js',
    },
    output: {
        filename: '[name].js',
        path: path.resolve(__dirname, 'dist')
    },
    watch: true,
    plugins: [],
    devServer: {
        static: __dirname + '/dist',
        open: true,
        port: 3333
    }
};
prod
const path = require('path');
const HtmlWebpackPlugin = require('html-webpack-plugin');
const properties = require('properties-parser');

const config = properties.read('../../head-build.properties');
module.exports = {
    entry: {
        'index': './src/index/index.js',
        'about': './src/about/about.js'
    },
    output: {
        filename: (chunkData) => `[name].bundle.${config['tool.'+chunkData.chunk.name]}.js`,
        path: path.resolve(__dirname, '..', '..', 'loop-application', 'src', 'main', 'resources', 'static', 'tool'),
    },
    plugins: [
    ]
};
对于生产环境,我们还需要管理静态资源版本,处理比如浏览器缓存,版本统计之类的需求。
在resources目录下创建**head-build.properties **文件,在文件里面配置每个模块的版本,比如:
about=1.0
index=1.0
这个定义方式根据不同的环境,把资源输出到不同的文件,再写点java配置就能很好的使用。
把环境和版本信息都写入到请求域中,比如新建一个springboot的Interceptor然后注册在MvcConfigurer中。
@Component
@AllArgsConstructor
@Slf4j
public class TestlInterceptor implements HandlerInterceptor {

    private final ResourceLoader resourceLoader;

    private final Environment environment;

    @Override
    public void postHandle(@NotNull HttpServletRequest request, @NotNull HttpServletResponse response,
                           @NotNull Object handler, ModelAndView modelAndView) {
        Resource resource = resourceLoader.getResource("classpath:head-build.properties");
        try (InputStream inputStream = resource.getInputStream()) {
            Properties properties = new Properties();
            properties.load(inputStream);
            for (Map.Entry<Object, Object> objectObjectEntry : properties.entrySet()) {
                request.setAttribute((String) objectObjectEntry.getKey(), objectObjectEntry.getValue().toString());
            }
        } catch (IOException e) {
            log.error("head版本文件加载失败");
        }
        Boolean isDevProfile = environment.acceptsProfiles(Profiles.of("dev"));
        request.setAttribute("dev", isDevProfile);
    }
}
接下来就可以很方便的在thymeleaf中引入资源文件了,根据不同的环境加载不同的js资源。
  <script th:if="${dev}" src="http://localhost:3333/about.js" defer></script>
  <script th:unless="${dev}" th:src="@{'/tool/static/about.bundle.'+ ${about} +'.js'}" defer></script>
3. 结合vite
本来折腾了webpack已经能满足使用了,自从毕业半年就从前端转后端以后,没接触过新的前端技术,按捺不住,还是尝试一下vite打包工具。
一番使用下来,体验非常好,本blog就是用vite+mdui+thymeleaf构建 详情可看。
我们还是在templates下新建目录 blog,初始化vite不再赘述,贴一下vite的配置文件vite.config.ts。
export default defineConfig({
    build: {
        emptyOutDir:true,
        manifest: true,
        rollupOptions: {
            input: {
                "main": "main.js"
            }
        },
        outDir: "../../static/blog"
    }
})
这样资源在打包以后就能进入static目录,走springboot的默认的资源映射就能请求到了。
再贴一下开发时的模板引入资源的姿势。
<th:block th:if="${blogUtil.getDev()}">
    <script type="module" src="http://localhost:5173/@vite/client"></script>
    <script type="module" src="http://localhost:5173/main.js"></script>
</th:block>
<th:block th:unless="${blogUtil.getDev()}">
    <script type="module" th:src="${blogUtil.getJs('main.js')}"></script>
    <link th:each="link:${blogUtil.getCss('main.js')}" th:href="${link}"
          rel="stylesheet">
</th:block>
开发的时候就直接请求vite的资源端口就行了,自带热重载。
生产环境就请求打包在static目录中的文件。根据 vite文档 可配置打包以后生成以后版本信息的json文件。那么我们只需要在项目启动的时候把json文件写入到工具类中就能随时读取到具体的文件了。
@Setter
@Component
@Slf4j
public class BlogUtil {
    private final ResourceLoader resourceLoader;
    private final Environment environment;
    @Getter
    private Boolean dev;

    HashMap<String, BlogStatic> blogStaticMap = new HashMap<>();

    public BlogUtil(ResourceLoader resourceLoader, Environment environment) {
        this.resourceLoader = resourceLoader;
        this.environment = environment;
    }

    @PostConstruct
    public void init() {
        Resource resource = resourceLoader.getResource("classpath:static/blog/.vite/manifest.json");
        try (InputStream inputStream = resource.getInputStream()) {
            JSONObject parse = JSONUtil.parseObj(IoUtil.readUtf8(inputStream));
            for (Map.Entry<String, Object> objectEntry : parse) {
                String key = objectEntry.getKey();
                JSONObject value = (JSONObject) objectEntry.getValue();
                blogStaticMap.put(key, new BlogUtil.BlogStatic(value.getStr("file"), value.getJSONArray("css").toList(String.class)));
            }
        } catch (IOException e) {
            log.error("blog版本文件加载失败");
        }
        this.dev = environment.acceptsProfiles(Profiles.of("dev"));
    }

    @Data
    @AllArgsConstructor
    public static class BlogStatic {
        String js;
        List<String> css;
    }

    public String getJs(String key) {
        return "/static/blog/" + blogStaticMap.get(key).js;
    }

    public List<String> getCss(String key) {
        return blogStaticMap.get(key).css.stream().map(x -> "/static/blog/" + x).toList();
    }
}
然后把这个工具注入到页面中,thymeleaf就能调用了。
@Component
@AllArgsConstructor
@Slf4j
public class ModuleInterceptor implements HandlerInterceptor {
    private final BlogUtil blogUtil;

    @Override
    public void postHandle(@NotNull HttpServletRequest request, @NotNull HttpServletResponse response,
                           @NotNull Object handler, ModelAndView modelAndView) throws Exception {
        request.setAttribute("blogUtil", blogUtil);
    }
}
以上就是现代化前端打包工具在传统springboot服务端渲染中的巧用,当然都不是官方方案,仅限个人折腾,如果有更好的思路欢迎讨论。